Step by step

What do I need to illuminate my garden?

Step 1: To illuminate the garden, you will need lamps, fixtures, and wiring. There are various options available for this purpose, such as ground spots, stake lights, and standing lamps. For example, you can choose to light up the driveway with recessed ground spots or standing lamps for orientation. For ambient lighting, you can place stake lights or standing lamps among the plants or under the trees.

Step 2: Determine the locations where the lamps should be placed. Think about this beforehand so that you can determine the required length of extension cables.

Show all steps

Step 3: Ensure there is a power outlet (230V) in the garden. The power outlet is necessary to connect the lighting system.

Step 4: Choose the right transformer. A transformer converts 230 volts to 24 volts, which is the voltage of our lighting system. Follow these steps to select a transformer. Add up the wattage of all the lamps to determine the required transformer. The wattage is specified in the product description and on the product box.

Example:

  • If you need 10 lamps, each with a power consumption of 3 watts, the total wattage is 30.
  • In our range, we have transformers of 40 watts, 60 watts, and 100 watts.
  • A wattage of 30 watts falls below the maximum wattage of the 40-watt transformer, making it suitable for the setup.

Note: Each transformer can be loaded up to 90% of its capacity. For example, a 60-watt transformer can handle a maximum load of 54 watts.

Step 5: Choose the right cables. At Lyslight, there are two types of cables, making our system simple and easy to install. There are extension cables and cable splitters. These are needed to extend the cable from the transformer to the fixtures. The cable splitter is used to split the cable when connecting a fixture and to continue the cable to the next fixture.

Step by step

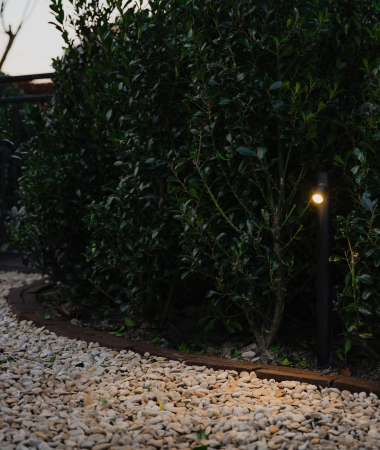
Step-by-step guide for installing our lighting system

If all the necessary products for the lighting plan are available, you can start the installation of the garden lighting. Below are the step-by-step instructions:

Step 1: Place the lights in the ground.

Step 2: Position the transformer near the power outlet.

Step 3: Connect the extension cables to the cable coming out of the transformer and run them to the nearest fixture.

Show all steps

Step 4: Attach a cable splitter to the extension cable when it reaches the location of the first fixture.

Step 5: Connect one of the splitter cables to the fixture, and connect the remaining cable of the splitter to an extension cable to continue to the next fixture. Tip: The last fixture doesn't require a cable splitter; it can be directly connected to the extension cable.

Step 6: Conceal the cables in the ground. Tip: In our experience, running the cables along the edges of pathways works best. Borders and hedges are also suitable places to hide the cables. Use a shovel to create a narrow trench where the cables can be placed. Then, compact the soil to cover the trench. Due to the low operating voltage, the system is safe for humans and animals, providing peace of mind. Additionally, all our 24-volt Plug & Play products, such as LED deck lights, LED stake lights, and LED floor lamps, use the same connector. This allows you to combine all our 24-volt garden lighting and connect them to a single transformer. To use the 24-volt ground spots, the 24-volt transformer needs to be purchased separately. The transformer converts the power to the low operating voltage. There are 3 transformer options to choose from.